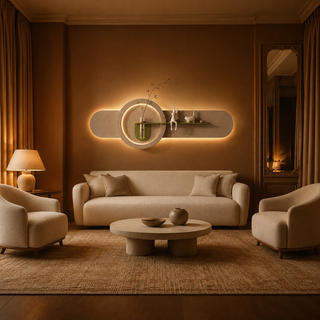
![[thehouseland] best wall art - Cream / Wave backlit curved wall panel with shelf and glass bud vase, warm LED backlight on](http://thehouseland.com/cdn/shop/articles/1004_variant_cream_wave_d8cf382c-6585-45df-af7c-637e5e82ea88.png?v=1788606339&width=3840)
Prime the filler before you paint it. That single step is the difference between a wall nobody looks at twice and a row of chalky gray rings, one around every hole. Hardly anyone who sets out to patch nail holes before moving out gets the filling wrong — they get the porosity wrong, because bare spackle drinks the topcoat while the sealed paint beside it does not.
The holes themselves matter far less than the repair does. A picture-nail hole is normal wear and tear almost everywhere in the country; a ring of dead-flat paint around it is a job someone did badly, and that is what an inspector writes down. Houseland wall pieces hang from keyhole slots, so the mark left after a piece lifts off is a round screw hole with no bracket outline pressed into the paint around it — the easiest kind of mark there is to make vanish.
![[thehouseland] best wall art - Backlit plaster ring wall art on a sage green wall with a walnut shelf and glass bud vase](https://cdn.shopify.com/s/files/1/0776/4046/6479/files/il_fullxfull.8324332616_9yw0.jpg?v=1785994148)
How do I patch nail holes before moving out so the repair disappears?
Six steps, and the two that get skipped are the primer and the wait.
- Back the fixing out, never lever it sideways. A screw wound out counter-clockwise leaves a clean round hole. A nail rocked out with pliers tears the paper face of the drywall, and torn paper fuzzes up the moment filler wets it.
- Fill in two thin passes rather than one mound. Hold the putty knife almost flat, press filler into the hole, scrape the surface level, and come back for a second pass once the first has set. Spackling is gypsum plaster and glue, and it shrinks less than joint compound — less, not zero, which is why a single fat fill sinks into a dimple by morning.
- Give it the label's time, not the touch test. Loconsolo puts lightweight spackle at 30 minutes to 1 hour on a nail hole and standard spackle at 1 to 2 hours, while a deep fill or a second coat can want several hours up to a full 24 hours.
- Sand only when it is dry all the way through. Sanding damp filler drags it back out of the hole and leaves a crater that shows worse than the nail did. Two light passes with fine paper, held flat, until your fingertip cannot find the edge.
- Spot-prime the patch and nothing else. Primer forms a binding layer and stops a porous surface pulling the solvent out of the finish coat early. Cover the filler and a thumb's width of wall around it, no more.
- Two thin coats, applied the way the wall was applied. Home Repair Atlas is blunt about the tool: rollers leave an even stipple and brushes leave strokes, so a brushed dab on a rolled wall shows as texture even when the color is dead right. Thin coats beat heavy dabs, and too much paint makes the spot more visible, not less.
Cold flats break this schedule. Drying-type compound wants a room above 55 °F (13 °C) and a setting-type will still cure down at 45 °F, so a January move-out in an unheated flat needs the heating on the night before, not the hour before. Anchors change the sums too: if you used plugs or self-drillers rather than a screw straight into timber, read how to find studs for wall art next time, because a stud fixing leaves the smallest hole of the lot.
Why is there a dull ring around every patch I filled?
Two surfaces of different porosity dry the same paint to two different sheens. Painters call the result flashing, and it is a light problem rather than a color problem.
Home Repair Atlas ranks a sheen mismatch as the most common reason a touch-up stands out, and puts skipped primer right behind it: bare spackle and joint compound take up paint unevenly, so the film over the patch ends up thinner, flatter and slightly starved. The wall around it has years of sealed, cured film underneath. The ring is a sheen difference, not a color difference, so a better color match will never remove it.
Side light is what turns a small difference into a visible one. A lamp, a hallway fitting or a window raking across the wall at a shallow angle reads texture that flat-on light hides completely — which is why a patch you approved at noon appears at 7 pm with the lamps on. The gloss trade measures this deliberately: gloss is read at a specular angle of 60°, with 20° kept for high-gloss finishes and 85° for matte ones, because one angle cannot describe how differently those surfaces throw light back.
Two smaller causes are worth knowing before you blame the paint. Unstirred paint separates and the sheen rises to the top, so a badly mixed touch-up comes out glossier than the wall it came from. And the wall has aged under sun, dust and washing, so year-old paint from the same tin is no longer the same surface.
![[thehouseland] best wall art - Specification diagram of the plaster ring wall art, 120 x 70 cm with a 70 cm ring diameter](https://cdn.shopify.com/s/files/1/0776/4046/6479/files/il_fullxfull.8372199981_ld0p.jpg?v=1785994148)
Flat vs satin: which sheen forgives a spot repair?
Flat forgives almost anything, satin forgives almost nothing, and the gap between them decides whether your evening is 20 patches or a whole wall rolled out.
| Wall finish | How a spot repair reads | What that means at move-out |
|---|---|---|
| Flat or matte | Hides both texture and sheen; the most forgiving surface there is | Prime the patch, dab two thin coats, done |
| Eggshell | Usually invisible head-on, faintly visible in raking light | Spot repair, then check it after dark with a lamp on |
| Satin | Sheen mismatch shows, and shows worse on dark colors | Expect to roll the full wall, corner to corner |
| Semi-gloss or gloss | Shows the patch and the roller edge both | Full wall, and cut in at the corners rather than mid-wall |
| Textured or sprayed | Colour matches, surface pattern does not | Match the texture first; a smooth patch on an orange-peel wall is obvious in any sheen |
Home Repair Atlas draws the same line, calling a mismatch worst on satin, semi-gloss and gloss with dark colors, and recommending a full wall when the sheen is noticeable or the repair is bigger than a small mark. Work out which row you are in before you open anything: run a hand across the wall in low light and look along it from the side. If your own reflection has any shape to it at all, you are below the eggshell line and planning a wall, not a patch.
Which holes does a landlord actually get to charge for?
Small ones, hardly ever. Deposit Deadline’s read of the case law is that nail holes from hanging pictures are normal wear and tear in the vast majority of states, with California and Washington saying so explicitly, and it sorts them by width rather than by count.
- Pin holes up to 1/8 in wide — picture nails, treated as normal wear and tear.
- Holes of 1/8 in to 1/4 in — small hooks, still normal wear and tear.
- Holes of 1/4 in to 1/2 in — medium anchors, a gray area that turns on how many there are.
- Anything wider than that — heavy mounts and toggles, likely to be billed as damage.
Quantity is the second axis. Two to four holes in a wall reads as ordinary occupation; dozens in one wall invites a question about what was hung there. And the money is worth knowing before you argue: filler and a putty knife cost under $1 per hole by that site’s reckoning, while a professional repair of the genuinely large holes runs $25 to $75 each. A charge of $50 for a picture-nail hole is the sort of figure it calls plainly unreasonable, and knowing the real repair cost is what lets you say so.
This is the quiet argument for lift-off mounting. A piece from the wall art collection hangs on keyhole slots, so what stays in the paint is a round screw hole in the smallest band on that list, with no bracket outline pressed around it and no splayed pair of holes to fill. If a set is coming down with you, taking keyhole-hung shelves off the wall is a lift rather than an unscrewing job, and the screws come out afterwards with the modules already safe on the floor.
![[thehouseland] best wall art - Plaster ring wall art lit above a wooden console, warm halo spilling onto the wall](https://cdn.shopify.com/s/files/1/0776/4046/6479/files/il_fullxfull.8370794041_rnfw.jpg?v=1785994148)
![[thehouseland] best wall art - A backlit cream plaster wall panel with a glass bud vase and integrated LED glow, mounted above a fluted wood](https://cdn.shopify.com/s/files/1/0776/4046/6479/collections/g1_hero_222b6f80-d8a4-4bab-af3c-229df683d0d5.png?v=1786211602)
From the shop
Wall Art
Wall Art is where the mounting side of this problem starts: pieces that hang from keyhole slots or a single screw, so a wall gets round screw holes rather than a bracket footprint. Nothing in the collection fills a hole for you.
Browse Wall Art — sizes, options & pricesWhat do I do if the patch still shows after two coats?
Stop dabbing and roll the whole wall, corner to corner. A third dab adds film thickness in one spot, which is the thing that made it visible in the first place.
Home Repair Atlas puts four conditions on that call, and any one of them is enough: the touch-up keeps showing, the existing paint is old, the wall carries a noticeable sheen, or the repaired area is larger than a small mark. A wall rolled edge to edge in one session cannot flash, because there is no boundary left for the eye to find. Corners and edges are where you stop; the middle of a wall never is.
Before you buy anything, ask the landlord or the managing agent for the paint code and the finish in writing. Half the flats in a block were rolled out of the same batch, and a leftover tin in the building store is a better match than any scanner in a paint shop, which reads a faded surface rather than the original color. Ask early: the request costs nothing while the tenancy is running, and it is an awkward conversation once you have handed the keys back.
Two smaller rescues first. Let the touch-up cure for a few days before you condemn it, because a fresh film settles as it hardens. And if one wall of four is patched, roll that wall alone: a whole wall in fresher paint reads as clean, half a wall reads as a repair.
What I'd do
Walk the flat at dusk with a lamp held low and flat against the wall, and mark every hole with a pencil dot before touching a tub of filler. Raking light finds holes and old patches that daylight will not, and counting them tells you whether this is a patching job or a repainting one.
Then work in one pass per stage across the whole flat rather than finishing each hole: fill everything, let it dry, sand everything, prime every patch, and paint last. The waiting is the same 24 hours whether you have 3 holes or 30, and batching turns a whole evening of fiddling into two short sessions. Where a wall is satin or dark, book the time for the full wall now rather than discovering it at 10 pm on the last night.
Next time, cut the number of holes rather than getting better at filling them. Houseland sells wall pieces that hang from keyhole slots for exactly this reason, and a set that is planned before it is drilled makes fewer marks: testing a shelf layout on paper before drilling is half an hour that saves you the holes you would otherwise be filling tonight.
Shop wall art from Houseland
![[thehouseland] best wall decor for living room - LED Wall Art with Shelf and Bud Vase, Backlit Stone Textured Panel for Above Sofa](https://cdn.shopify.com/s/files/1/0776/4046/6479/files/1001_variant_cream_arch_96958661-395d-48f6-805f-54585d750005.png?width=600) -17%LED Wall Art with Shelf and Bud Vase, Backlit Stone Textured Panel for Above Sofafrom $499.99
-17%LED Wall Art with Shelf and Bud Vase, Backlit Stone Textured Panel for Above Sofafrom $499.99![[thehouseland] best large wall art for living room - LED Wall Art with Shelf and Bud Vase, 59 in Backlit Stone Textured Panel](https://cdn.shopify.com/s/files/1/0776/4046/6479/files/1001_variant_cream_7a07242c-393d-402a-843d-82c3e589177c.png?width=600) -17%LED Wall Art with Shelf and Bud Vase, 59 in Backlit Stone Textured Panelfrom $499.99
-17%LED Wall Art with Shelf and Bud Vase, 59 in Backlit Stone Textured Panelfrom $499.99![[thehouseland] best led wall art - LED Wall Art with Shelf and Bud Vase, Fluted Sandstone Backlit Panel](https://cdn.shopify.com/s/files/1/0776/4046/6479/files/1003_room_living_P01_e4f4e1e3-99c5-4844-b05f-8e4e27939540.png?width=600) -13%LED Wall Art with Shelf and Bud Vase, Fluted Sandstone Backlit Panelfrom $349.99
-13%LED Wall Art with Shelf and Bud Vase, Fluted Sandstone Backlit Panelfrom $349.99![[thehouseland] best wood wall panel decor - LED Wall Art with Shelf and Bud Vase, Oval Backlit Panel for Living Room](https://cdn.shopify.com/s/files/1/0776/4046/6479/files/1005_room_salon_P03_6e812840-c0a5-4cec-b1d7-06102c56d83d.png?width=600) -15%LED Wall Art with Shelf and Bud Vase, Oval Backlit Panel for Living Roomfrom $549.99
-15%LED Wall Art with Shelf and Bud Vase, Oval Backlit Panel for Living Roomfrom $549.99![[thehouseland] best plaster wall art - Backlit Plaster Wall Art, Japandi LED Ring with Walnut Shelf and Bud Vase](https://cdn.shopify.com/s/files/1/0776/4046/6479/files/il_fullxfull.8324332616_9yw0.jpg?width=600) -13%Backlit Plaster Wall Art, Japandi LED Ring with Walnut Shelf and Bud Vasefrom $349.99
-13%Backlit Plaster Wall Art, Japandi LED Ring with Walnut Shelf and Bud Vasefrom $349.99![[thehouseland] best wabi sabi wall art - Wabi Sabi Wall Art, Stacked Pebble Totem in a Stone-Effect Finish](https://cdn.shopify.com/s/files/1/0776/4046/6479/files/il_fullxfull.8321764996_em1f.jpg?width=600) -55%Wabi Sabi Wall Art, Stacked Pebble Totem in a Stone-Effect Finishfrom $139.99
-55%Wabi Sabi Wall Art, Stacked Pebble Totem in a Stone-Effect Finishfrom $139.99